THE MASK QUEST
Everyone in Graal needs to know this quest. I will explain it to you!
1. Go to Burger Refuge in West Graal City and buy a burger for 30 gralats. Don’t eat it!


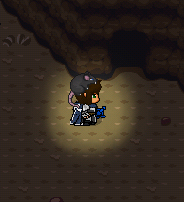
2. Now go to extreme North Mod Town and enter the cave. Go to the right, pass a lake and you will find a poor person. Give him the burger. He will give you cat food.

3. After this go to North Swamp Town. You will find a guy and his cat in a tree. Give him the cat food and the cat will go down. The guy will give you the rag.
4. Go to Mod Town and find a little square house. Enter and give the rag to the guy. In exchange, he will give you a Mirror.

5. Beside Angel Clan, there is a cave entrance. Enter and you will find a huge house. Enter and go to the left door. Now enter in one of the bathrooms and find a girl. Give her the Mirror and she will give you a green shirt.

6. Now go in York Town’s bar and find a pirate, with no shirt. Give him the green shirt and he will give you matches.
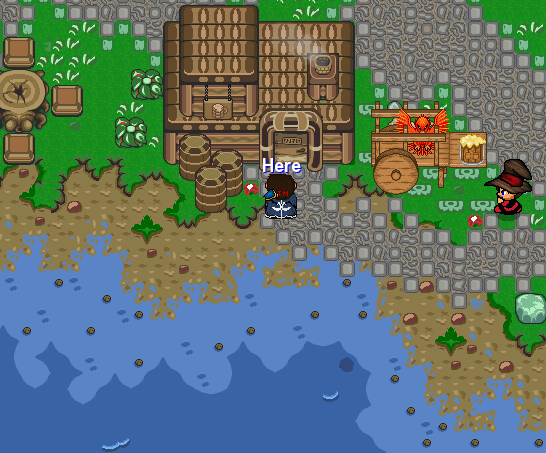
7. Go to West Onnet Town, you will see a house but you won’t be able to enter. It’s because you have to jump in the roof! When you are Inside you will find a little woman. Give her the matches and she will give you a paint brush.

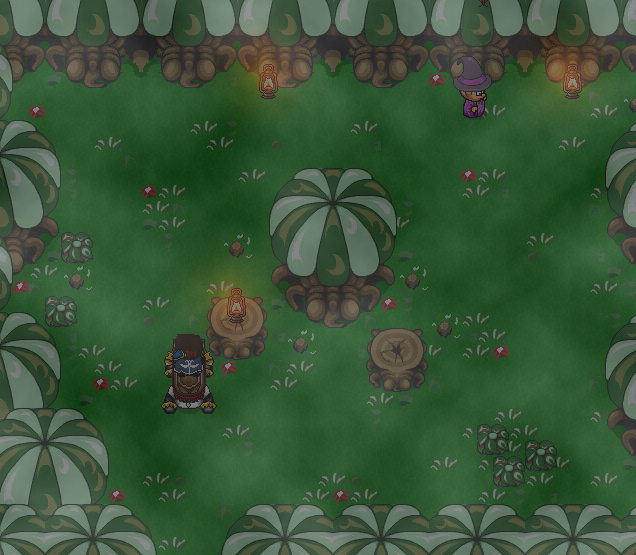
8. After this go in the forest between York Town and Graal City. In the middle, you will find a painter, Hyto. Give him the paint brush and he will give you a book.

9. Now go to Graal City and find the Battle Arena. Enter and go to the right, find the Library. Give the guard the book and he will give you the fishing line.


10. Finally, go to the Bridge and find the fisherman. Give him the fishing line and he will give you the scarf.
11. After obtaining the scarf, a new shop will appear in the trees next to Hyto the painter. But apparently the shop owner wasn’t ready to open…… so you have to wait 30min and come back. The shop will sell a couple of masks (2500 gralats each) You want to know what is the utility of the scarf? No one know, but some rumors say that the quest is still incomplete and the scarf may be used in the future…

Here is a map with all the steps for the quest.

DAILY BOUNTY CONTRACTS
Bored of farming and you want more gralats? Try the bounty contracts!
To begin your daily bounty, you need to visit the Castle first. The Castle is just west of Graal City. Upon entering the Castle, just keep going up and up through the halls until you get to the Throne Room. Then take the door on the right, and you enter the Royal Steward’s Bounty Office.


Talk to the Steward, and after a long explanation of the system, he will offer you a bounty contract. The terms of the contract will require you to kill a certain number of a specific type of baddy (enemy). For example, “50 Lizardons,” or “100 bats.” The Steward will also tell you a general location to give you an idea of where to find that type of baddy. The Steward also tells you to take your bounty to the Castle dungeon upon completing the contract.
Anyway, once you accept the contract, you will have 24 hours to complete it. The Steward will give you a capture crate, which will follow you around for the duration of the contract. You will not be able to use any items other than your sword and glove while the capture crate is out. If you are not familiar with specific baddy names, tap the capture crate hotkey and it will show you a picture of the type of baddy you are looking for and how many you need to kill. Dropping your crate will allow you to use items again. Also, you will drop your crate every time you die, so remember to pick it up after respawning. When you drop your crate, it will stay in that exact location until you pick it up again, or it will disappear after the 24 hours expire. Therefore, it is important to remember where you drop your crate! However, if you forget where you dropped it, just tap the capture crate item button in your item inventory and tap “call.” m. Once you kill the correct type of baddy, your crate will automatically drop and add the kill to your bounty.

When you complete your bounty contract, stars will pop out of your crate. yippee. Now you need to take your capture crate to the Castle Dungeon. Once you enter the Castle again, take the bottom-right door. Keep walking right through the hall to the next right door. From this corner room, there are two doors on the top wall. Go through the door on the right, next to the Esquire, and those stairs lead down to the Dungeon. Talk to the Warden, and he will relieve you of your crate and reward you with 1,000 gralats.
This quest can be completed once every 24 hours
THE RAT MORPH QUEST
First of all, you will need to go to Onnet Town Forest, in North Onnet Town.

The forest is a real maze. You will have to find the good combination of doors (4) to reach the witch. The combination is different for each person, so I can’t help you!


When you find her, talk to her and she will give you the rat morph, and with that you will be able to enter some secret places in Graal.


BIG CITY CALDERA QUESTS
For these quests, you need to go to Big City Caldera with the ship.


The TRANSLATION BOOK QUEST:
1. You need to go behind the island. Find some rocks in a form of an hexagon.

2. Use your flippers in the middle of the rocks.
3. You will fall in a cave. Go to the door at the end of it.

4. Keep going until you find a dead tree. Jump in it!

5. In the top of the cave, you will have to dig around the skeleton, so use your shovel! You have to find a petrified note.
6. Exit the cave.
7. Now you have to find the head archaeologist in an archeological site below the cave. Talk to him.

8. Show him your petrified note. He will take it and he will go away. Follow him in the cave, where you found the note.

9. Talk again to the head archaeologist and he will give you the translation book. With the book, you will be able to talk to the Natives.

The CHIEFTAIN NECKLACE QUEST:
1. Go to the Native Chief’s house, at the top of the island.

2. Talk to him and he will ask you to help him by searching his necklace. Everyone has a different place, so I can’t very help you…)

3. Dig at the place he said until you find the necklace.
4. Go back to the Chief and give him the necklace. He will give you the Bear Hat.

5. For the Bear Morph, find a house with a woman and a fire inside it. Wear your bear hat and she will give ou the morph!


DESTINY QUESTS
The KEY QUEST:
1. You have to go on the left rampart of the city. Jump on it and enter the little square coner. Pull and push boxes to find the key.

The BOOTS QUEST:
1. Go in the Boots Factory in Destiny.

2. Talk to the guy Under the boots. He will go check in a box of boots.
3. When he comes back, he will offer you to choose ONE AND ONLY ONE type of boots. Choose wisely. (5000 gralats each) I suggest you the hover boots 🙂
 Hover Boots.
 Ice Boots.
 Moon Boots.
 Opposite Boots.
 Splash Boots.
The GNOME QUEST:
1. Go to this house in Destiny. You will meet a little gnome, crying. Talk to him a couple of times and he will ask you to help him. Yes sure!

2. You have to find a free place to do a blacksmith inside. There it is in Onnet Town (you need the rat morph to enter).
3. Inside, you have to destroy all: bushes, grass and mouses. When it is done, a deed will appear.
4. Bring the deed to the banker at Graal City’s bank. He will ask you to buy the property for like 100000 gralats. Say no. He will ask you to buy it for 200 gralats. Say yes!

5. Bring the deed back to the gnome in Destiny. He will be happy 😀
6. Go back to the house you bought for him and talk to the gnome. He will say to come back later.
7. Later, go back to the house and talk to the gnome. He will upgrade your lantern!
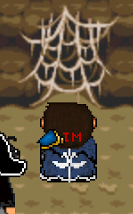
8. With your upgraded lantern, you will be able to destroy spiderwebs in Destiny:
8.1. To find the Destiny Guards’ hat 

8.2 To find new bombs with your key.


The FIREMAN QUEST:
1. Go in Destiny and find the Fire Station.

2. Talk to the fire chief. Then he will go in a mission with the other firemen. Follow him.

3. Find the chief and his partners in this cave. Talk to him. He will ask you to explode the rock upstairs. Do it.


4. Now go back to the Fire Station and talk to the chief. He will give you the fireman hat!

The COIN QUEST:
1. Go in Destiny destroyed Church. Enter on the left side of the door.

2. You will have to kill the Lizardon and explode the big rock.

3. Talk to the priest. You will receive the coin!

4. After this, you have to go to the cave near the Church.

5. On top of it, there is a little door. Use your coin in front of it and it will open.


Secret cave! In it, you have:
-An rps hat
-the GOD BOW
-Someone to sell a couple of loots.
-The Map Satchel
CASTLE’S QUEST

This is the global map of the Castle.
Just inside the entrance, there is a courtyard with a few things for sale. I think it is worth noting there is a horseshoe upgrade here. It gives a small speed boost for a rather steep price of 20,000. However, this can only be applied to ONE mount. I don’t recommend buying it at all unless your favorite mount to use is noticeably slower than others.
Once you enter the Castle for the first time, there are a few free chests to open. From the foyer, go up the right staircase and take the upper-right door. Walk straight across the hall to the next door. In this corner room, there two more doors: a stairwell leading back downstairs, and a door at the top; take the top door. Walk up across this balcony bridge and through the next door. This room also has two doors on the top; take the left door into the guard barracks. Sadly, there are no gralats in the chests. The only thing to rob from the guard are free bombs and arrows. However the top-right chest contains a free guard hat

Warp Ring Quest:
This quest begins in the Guards Outpost, an annex west of the Castle outer wall.

Inside the Guard Outpost, your goal is to steal the Castle Treasury Key without getting caught. If a guard sees you, you will be thrown outside and will have to start over. This means you cannot walk in front of a guard (unless he is asleep). However, guards cannot see through obstacles, so you are able to hide behind things. Sleepy guards wake up and go back to sleep every few seconds, so you can only pass in front of them when they are sleeping.

In the front half of the room, there are four guards. One sleepy guard (D) is stationed directly in front of the door. One guard (C) walks left and right across the yellow rug. Two guards (A and B) walk in a counterclockwise square path around the skull posts. If you stand idle at the door too long, guard A will see you when he turns the corner. When you first enter, guard C will be running left. As soon as guard C turns around and starts running right, this is your chance to run up-left diagonally. Just hold the up and left arrow keys until you are safe between the barrels and wall. The area around the cyan-colored ring is a safe checkpoint. If you start running too soon, guard C will see you from his peripheral; and if you start running too late, guard B may catch you when he turns the top corner.
In the back half of the room, there are two guards. One sleepy guard (F), and one guard (E) that walks counterclockwise around the table. Follow behind guard E around the table; but wait at the bottom right corner (yellow ring) until guard F is asleep. You will have to hurry quickly around the bookcase before guard E turns the corner facing upward. If you continuously fail the back half, just wait at the checkpoint and allow guard E to make one full circle around the table before following him. Sometimes guard F’s sleep cycle doesn’t sync perfectly with guard E’s circle path. Anyway, pick up the key and get out (after you have the key, you will not lose it; so it is okay to be seen).
Now that you have the key, go inside the Castle. From the foyer, go up the left stairs and take the upper left door. Go straight left across the hall and take the next door. In this corner room, there are two doors: one staircase leading back downstairs, and a door at the top; take the top door. Walk up across the balcony bridge to the next door. You should be in the hallway here:

If you haven’t noticed already, there is a walking NPC that circles around the castle in a hurry to make sure all the sconces are lit. However, it seems he forgot one here in this room. Get out your upgraded lantern and light it. (If you do not have an upgraded lantern that throws fireballs, see the lantern item guide). A secret passage will be revealed leading to the king’s treasury. You can collect 130 gralats from the chests. The large chest in the center is opened with the key we just stole. Inside the large chest is the Warp Ring.


Warp Crystal
The Warp Ring is in your Tools folder of your item inventory. The first time you use the item, it opens a “Warp Locations” menu, but the only option is “???.” Tap it and you will be warped to a secret garden cave (this cave is actually located just east of the Golden Gate, but is inaccessible). In front of the statue, there is warp pedestal. Grab the front of it and remove the red warp crystal. Note: if you remove the warp crystal from this pedestal, you will never be able to return to this garden.

You are only able to warp to warp pedestals that hold one of your warp crystals. The warp crystal you grabbed earlier is in your Tools inventory also. Set it as a hotkey and use it while standing in front of a warp pedestal.

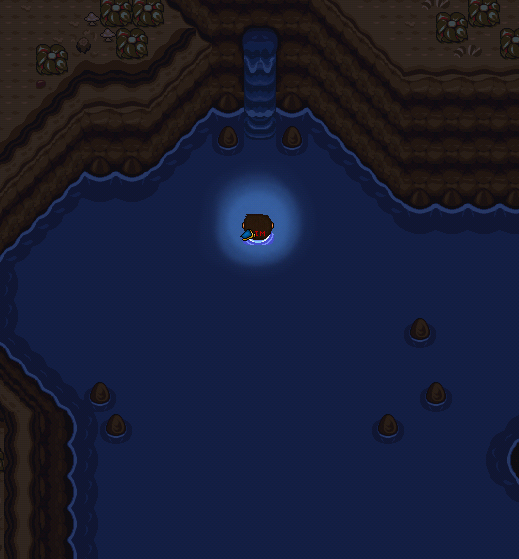
There are thirteen warp pedestals around the world, but you currently only have one crystal; so you need to choose wisely where you decide to set your warp crystal.
-“???” Secret Garden. (Cave east of the Golden Gate). This area is inaccessible after -removing the first warp crystal.
-Castle. Inside the grand hall, in front of the fountain.
-Onnet Town. The northernmost point, next to the forest maze and the railroad.
-MoD Town. The southwest corner, under the outdoor bar.
-Delta Island. Between the bridge and the guild spar battle arena.
-Stables. In Master Li’s forest, just under the horse stables.
-York Town. Next to the cathedral entrance.
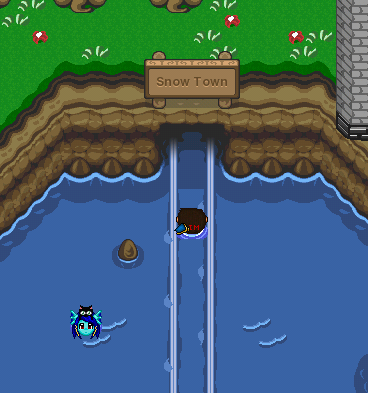
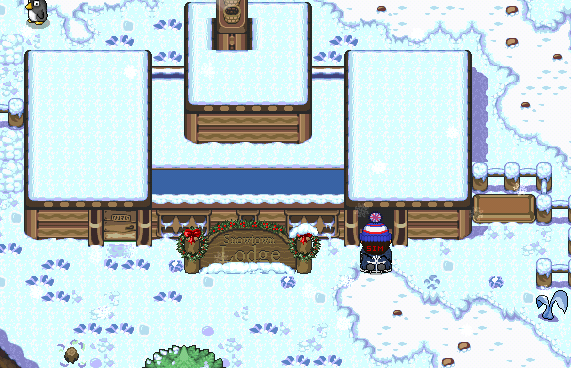
-Snow Town. East of the Snowtown Lodge, south of Snow Tunes.
-Railsystem Cave. Inside the railroad cave between York Town and Snow Town; In front of the lonely tree.
-Deadwood. South of the Deadwood Tower.
-Swamp Town. In the southwest corner, between the Swamp Town Tower, and Floydian’s house.
-Destiny. In the southeast corner, next to the Graal Fire Department.
-Big City Caldera. Just north of the ship.
There are a total of 3 Warp Crystals to obtain.
-The original warp crystal taken from the “???” garden cave.
-There is a warp crystal for sale in the Owl’s Nest for 8,000 gralats. (If you don’t remember, this place is in Destiny, and you need the loaded coin flip to get inside). -The third warp crystal is in the King’s bedroom.
The third warp crystal mentioned above is in a chest inside the King’s bedroom of the Castle. The King’s bedroom is connected to the same hallway where you got the Warp Ring (see instructions above for how to find this part of the Castle). However, the red captain of the guard will not allow anyone through the door; but we can sneak in a different way. Use your lantern to light the sconce again to open the secret passage. Inside the treasury, use the rat morph and go through the hole in the top wall. In this tiny passage, go up, then all the way right (ignore the two dead-end branches), then down. Now you are inside the King’s bedroom. However, the maid is blocking the chest that contains the warp crystal, and she will kick you out of the bedroom if she sees you.

The only way to open the chest is to enter the room when the King is sleeping. But the King spends most of his time around the Castle. He could be in the throne room, the banquet hall, the garden, the cathedral, or his bedroom. The King rotates around these locations every 3 hours… So I definitely do not recommend just waiting around and waiting for him to sleep. You should just check around the Castle every 3 hours. An easy to check if the King is in his bedroom: if the Maid is cleaning the throne room, that means the King is asleep. So then go back to his bedroom through the secret passage again. Since the King is asleep, you can freely go open the chest for the third warp crystal.
Dungeon Escapee
One day every week, the Castle dungeon will be closed while prisoners are transferred in and out. The following quest can only be completed on this day, after the prisoners are transferred and the dungeon reopens.
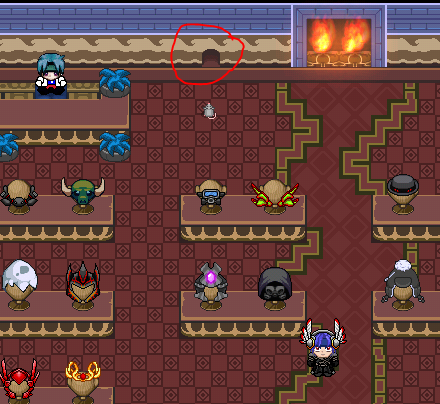
After completing a bounty contract and turning in your capture crate to the dungeon for your reward, the jail cell on the right (in the above picture) will be opened. Go inside and push the boxes aside to reveal a rat hole. When you enter the rat hole, there is a maze.
Directions: up, first right, up all the way to the top, left, down, left, up, right, up, left, up.
In this room, kill the rat and it will transform into a “dungeon escapee.” He begs you to not tattle on him and gives you a Big Spoon. Use the spoon to dig in the square of grass. Open the chest to get Square Bombs.


TOOLS
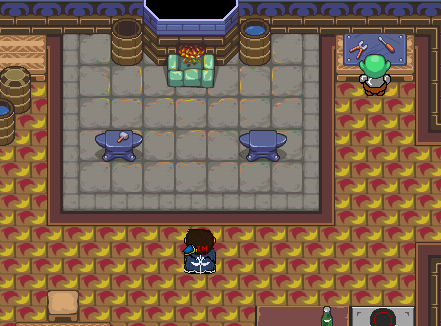
The SHOVEL:
1. Go to Mod Town and find a little lake. Enter in the central fall’s secret door.


2.Talk to the blue guy. He will ask you to participate to a little race. Do it and finish it. He will now give you the shovel!
![]()
The BUG NET:
1. Go to Mod Town in a little house. Find a guy that seems to be addict to bugs.

2. Only talk to him and he will give you the bug net…easy.

The LANTERN:
1. Go in the mountain near Onnet Town and you will find the lantern seller.

2. Tap on the lantern and buy it (2000 Gralats). With it, you will be able to go to Snow Town!
-The lantern can be upgraded with a quest in Destiny (see the quest)

The DRAISINE:
1. Go in Graal City and find the Train Station. Go see the Draisine seller and buy a draisine at the price of 4000 Gralats. With it, you will be able to go in all the caves around Graal!


The FLIPPERS:
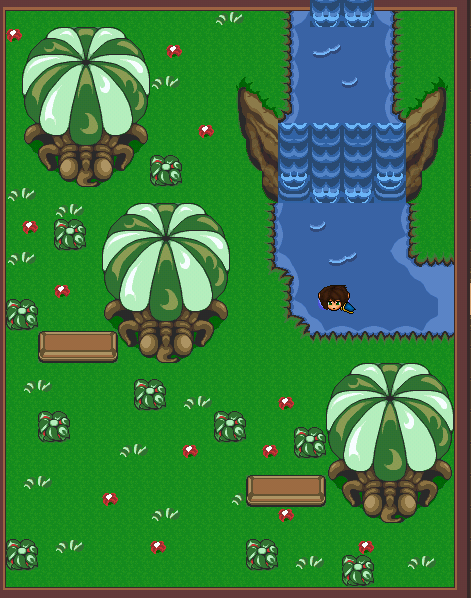
1. You have to meet Toll Guy, the guy with a fishing line on the bridge near Swamp Town. You need to buy him a fish for 500 gralats.

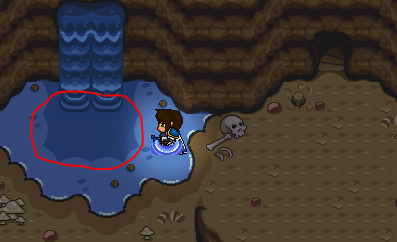
2. When you have your fish, enter the cave just beside York Town’s Church in the direction of Snow Town. You will find a little lake. Go on top of it, at the left. Enter the waterfall.
3. Go on the little Platform in the middle and show the creature your fish. She will give you the key for the chest. Open it…THE FLIPPERS YAY! You will now be able to get loots!


The GOGGLES:
*You need bombs and the draisine to get this*

1. Go on the railroad in the caves. You will find a big hole with rails…but there is a secret door on the top of it.
1.1. Stay on the right side of the hole.

1.2. Use your draisine.
1.3. When you are in the middle, go on top…there is an invisible track!

2. Use your bomb to destroy the rock…enter the bandits cave.
3. Go up in the door.

4. Again on top.

5. Again on top but the left.

7. Use the flippers in the little puddle.
8. You will find a chest. Open it and…


(By the way I never found the utility of this tool…but I think that it only allows you to stay longer in the water when you use flippers)
ROCK PAPER SCISSORS (RPS) GUIDE
HOW TO FIND RPS:
1. Go in this house in Graal City.

2. Enter the door to the left. After, in the door at the top.

3. Talk to the clown in the bar.

Now, you have Rock Paper Scissors. You can play with other players in Graal or against some people in specific places. If you beat them, they will give you their hat.
1. 
Go to the police station. On your left, there is a guy with a hat. Play with him and beat him.

2. 
Go to Mod Town’s Bar and find this guy. Play with him and beat him.


3. 
Go to Burger Refuge in Graal City. Play with the Chef in the restaurant and beat him.

4. 
Go to this house in Graal City. Watch the images because it’s hard to find…There are also 4 chests.


5. 
Go to the graveyard beside Graal City’s Church. There is a woman with the hat. Play with her and beat her.


6. 
Go to this house in Graal City. Meet the guy with the hat. Play with him and beat him.


7. 
Go in a cave just beside Onnet Town’s Forest. Meet the miner. Play with him and beat him.


8. 
Go to Snow Town’s Lodge. Meet the boy. Play with him and beat him.

9. 
In bandits cave. Find this bandit. Play with him and beat him.


10. 
In a cave, not the bandits one. Find this old guy. Play with him and beat him. There are also a couple of chests.


11. 
In the little cave just beside the big furniture shop. Find the guy. Play with him and beat him.


12. 
In Angel Clan’s Church. Meet this guy. Play with him and beat him.


13. 
In North York Town in this huge house. Play with the guy in the kitchen and beat him.


14. 
In Sardon’s Tower. Find this guy. Play with him and beat him.


15. 
See the Coin Quest in Destiny’s quests section. It’s a monkey. Play with him and beat him.
16. 
In Destiny. In a house that seems to be an hotel, in the last door to the right. Play with the guy and beat him.


17. 
In the cave of Pyrat Bay. Burn the spiderweb with your upgraded lantern (see the gnome quest). Play with the guy and beat him.

18. 
In the same cave as 11., there is a rat hole on top of it. Enter it with the rat morph, play with the guy and beat him.


19. 
In the lobby of the MoD Guild Council. Play with the guy and beat him.


20. 
This is not an RPS challenge, but it is a free hat. So I might as well put it here. Go the Onnet School. In the hall, there are lockers and clocks on the back wall. If you open a locker at the exact moment when the clocks are at 12:00 (both hands up), you will find a Dunce Cap. The clocks move a lot faster than real time, so it’s not really a 12 hour wait.

21. 
This isn’t a hat, but it is an item called Breakdance. It’s a gani item that lets you breakdance. Go under the main bridge below Graal City. Under the bridge, enter the Single’s Bar. TiNe is on the dance floor. Challenge him, and if you win, he will teach you how to breakdance.

THE GOLDEN PORTAL…MYTH OR REALITY?
I’m sure you have already seen this portal near Swamp Town, but you didn’t know what is its utility. Some rumors say that if you have all the 4 Graals, you will be able to enter. I tested it with all the Graals and…nothing. It’s a decoration. Only a decoration.


THE GIANT BLOB
This Giant Blob appears randomly in Swamp Town once every 3 hours. Everyone in the area will swarm it and it turns into a crowd quick. You can damage it with your sword, bombs, and arrows. However, so many people are bomb and arrow spamming, so using your sword is pretty ineffective. Dump your own bombs and arrows on it. You only need to hit it once to get the Slimy Spoils.

Open your Inventory and use the Slimy Spoils item to claim your reward. Most of the time, you will get a random number of gralats between 100-300. You can also get a hat, and there are a lot of different hats, so I can’t put them here. Finally, you can get the Frog Mount, a custom bomb, and a pet.


SECRET PLACES IN GRAAL
1. In Mod Town, Inside a little forest. It’s a secret shop where you can buy bugs hats.


2. Between Graal City and Mod Town, in a house. There is a couple of chests Inside.


3. At police station, Inside a prison. Use your rat morph…but there is only a biiiiiiiiiig cow…


4. Inside a house in Onnet Town. You need a password to enter, which is ”chicken”. Anyway there is nothing Inside.


5. At Snow Town’s hat shop. Use your rat morph and you will find a secret shop with magicians hat for…8 000 gralats each.

6. In South Swamp Town. Use your at morph behind the house. There is 2 chests Inside.


7. In Graal City, in a little cave. Enter the door at the left and pull on the bookcase. You will enter in a cave, but there is nothing to do there…


8. In Destiny, use a bomb on the wall of a house. There is only 1 chest.


9. In the graveyard beside Graal City’s Church. Push on the gravestone like this. There is 1 chest Inside.


10. In Graal City, in the Guards Department Inside the Battle Arena. There is 2 chests.


11. Under the bridge, just in front of the disco. There is 1 chest.

12. See the ”flower Hat” in RPS guide to find 4 chests.
13. In Swamp Town, in a little gnome’s house. There is 2 chests.


14. In the left rampart of Destiny, in the last corner. There is 4 chests.


15. In bandits cave. Find a couple of boxes like this. Push this one and you will fall in another cave. There is 2 chests.

16. See the Rat Hat in RPS guide. There is a couple of chests.
17. In pyrat’s cave. See the RPS guide. There is 2 chests.
There is a few others, I will describe them soon! Be patient! If you know one, just pm me!
GRALATS VALUE
Each gralat has a value. To know it, only tap on it.
 Multicoloured: 10000 and more!!!
 Agrias Butterfly: Value: 71 gralats
 Arizona Sister Butterfly: Value: 50 gralats
 Morpho Butterfly: Value: 51 gralats
 Clouded Yellow Butterfly: Value: 53 gralats
 Emperor Butterfly: Value: 20 gralats
 Green Hairstreak Butterfly: Value: 84 gralats
 Fatal Metal Butterfly: Value: 36 gralats
 Large White Butterfly: Value: 20 gralats
 Monarch Butterfly: Value: 34 gralats
 Peacock Butterfly: Value: 70 gralats
 Ringlet Butterfly: Value: 34 gralats
 Small blue Butterfly: Value: 52 gralats
 Spring Azure Butterfly: Value: 42 Gralats
 Swallow Tail Butterfly: Value: 40 gralats
 Tiger Butterfly: Value: 69 gralats
 Blumblebee: Value: 87 gralats
 Dragonfly: Value: 8 gralats
 Firefly: Value: 34 gralats
 Grasshopper: Value: 20 gralats
 /
/  Ladybug / Black ladybug: Value: 37 / 73 gralats
 Mantis: Value: 52 gralats
 Pillbug: Value: 86 gralats
 Spider: Value: 70 gralats
 Worm: Value: 1 gralat (In the ground. Find it with the shovel).
 Cockroach: Value: 6 gralats (only in dark caves)
 Black Beetle: Value: 56 gralats (only in dark caves)


 Black Pearl: Elster > 50 Gralats
 Blue Graal: Elster > 30 Gralats
 Broken Bottle: Elster > 5 Gralats
 Broken Goggles: Elster > 12 Gralats
 Broken Key: Elster > 5 Gralats
 Broken Sword: Blacksmith > 18 Gralats / Elster > 13 Gralats
 Chainless Flail: Blacksmith > 75 Gralats / Elster > 50 Gralats
 Cone Shell: Joshua > 10 Gralats / Elster > 8 Gralats
 Crab Shell: Elster > 9 Gralats
 Cracked Shield: Blacksmith > 18 Gralats / Elster > 13 Gralats
 Conch Shell: Joshua > 10 Gralats / Elster > 8 Gralats
 Dead Coral: Elster > 7 Gralats
 Defuse Bomb: Blacksmith > 7 Gralats / Elster > 5 Gralats
 Dirty Mug: Raphael > 5 Gralats / Elster > 5 Gralats
 Disabled Nuke: Elster > 45 Gralats
 Draisine Wheel: Railway Station Gift Shop > 17 Gralats / Elster > 13 Gralats
 Fish Bones : Elster > 15 Gralats
 Fishing Lure: Floydian > 45 Gralats / Elster > 30 Gralats
 Flat Soccer Ball: Elster > 7 Gralats
 Gemless Ring : Elster > 15 Gralats
 Gold Doubloon: Jack > 75 Gralats / Elster > 50 Gralats
 Gold Necklace: Unknown > 75 gralats / Elster > 50 Gralats
 Gold Nugget: Unknown > 75 Gralats / Elster > 50 Gralats
 Gold Pearl: Unknown > 150 Gralats / Elster > 100 Gralats
 Green Graal: Elster > 30 Gralats
 Heavy Anchor: Jack (Pyrat) > 20 Gralats / Elster > 15 Gralats
 Huge Conch Shell: Joshua > 20 Gralats / Elster > 15 Gralats
 Imperfect Pearl: Elster > 7 Gralats
 Kelp: Elster > 5 Gralats
 Magical Crystal: Elster > 100 Gralats
 Narwhal Horn: Elster > 75 Gralats
 Odd-shaped Gem: Old Wizard > 150 Gralats / Elster > 100 Gralats
 Old Boots: Elster > 5 Gralats
 Old Fishing Hooks: Floydian > 18 Gralats / Elster > 15 Gralats
 Old Horseshoe: Earl > 18 Gralats / Elster > 15 Gralats
 Old Lantern: Lantern Seller > 18 Gralats / Elster > 15 Gralats
 Old Underwear: Taylor Richaard > 7 Gralats / Elster > 5 Gralats
 Ornate Ring: Unknown > 75 Gralats / Elster > 50 Gralats
 Red Graal: Elster > 30 Gralats
 Rock: Elster > 5 Gralats
 Rotter Easter Egg: Elster > 5 Gralats
 Ruined Scarft: Taylor Richaard > 9 Gralats / Elster > 7 Gralats
 Sad Sign: Elster > 5 Gralats
 Sand-Dollar: Joshua > 15 Graats / Elster > 12 Gralats
 Scallop Shell: Joshua > 10 Gralats / Elster > 8 Gralats
 Sea Sponge: Elster > 12 Gralats
 Shark Tooth: Elster > 8 Gralats
 Shiny Mug: Raphael > 12 Gralats / Elster > 10 Gralats
 Ship Helm: Jack > 20 gralats / Elster > 15 Gralats
 Silver Doubloon: Jack > 20 Gralats / Elster > 15 Gralats
 Skull: Elster > 12 Gralats
 Star Fish: Joshua >10 Gralats / Elster > 8 Gralats
 Tarnished Crystal: Elster > 50 Gralats
 Tin Can: Elster > 5 Gralats
 Turtle Shell: Elster > 13 Gralats
 Vase: Elster > 5 Gralats
 Wand of Elements: Elster > 100 Gralats
 Water Amulet: Unknown > 150 Gralats / Elster > 100 Gralats
 White Pearl : Elster > 12 Gralats
 Weird Brick: (You can convert it into furniture or sell it) Elster > 50 Gralats
 Yellow Graal: Elster > 30 Gralats
Pourquoi tu mets pas tes info en anglais pour en finir avec sa!!!
i like it
this is really cool. thanks for this site. (newbie here)